

A Complete Guide to Cleft Apple Grafting for Beginners
Grafting is the joining of parts of different plants together to form a fusion. The root of the old plant (the rootstock) nourishes and promotes the growth of another plant, which is chosen to improve the variety or characteristics (the scion). Cleft grafting is a universal method, a favorite among gardeners. This method is used to graft fruit trees, shrubs, grapes, and domestic citrus fruits. A single tree produces several varieties of fruit, increasing yields.
Content
What's good about this method?
The method has many advantages and benefits:
- suitable for trees with different bark conditions;
- Not only young trees are used for rootstocks cuttings, but also old fruit-bearing ones;
- the work can be easily done by novice gardeners;
- there is no major preparatory work;
- takes little time.
For the apple tree they take pear rootstocks, quince, plums. cuttings Apple trees are grafted onto rowan, cherry, and hawthorn.
What is the best time for cleft grafting?
Apple trees are grafted year-round. The best results are achieved in the spring, when the trees are dormant. Success at other times of the year requires the experience of a gardener.
Winter
 Grafting is not recommended in winter. This requires extensive preparation and gardening experience. The trees are dormant. Grafting is performed indoors. The scion is harvested before frost and stored at 0°C. The cuttings are moved to a warmer location two weeks before grafting, and the scions are moved three days before. This work is performed from January to March. Planting in open ground is done 14 days after grafting or later.
Spring
Spring is the best time for cuttings to take root. The first sap flow begins, which favorably influences the results of the grafting. Nutrients accumulate in the tree, and buds and leaves develop actively. Cuttings are taken from trees over three years old in the morning or evening. Daytime temperatures should be around 10°C. Sap flow is checked by ensuring the bark separates easily from the wood.
Summer
The second stage of sap flow begins in summer, but grafting is not recommended at this time due to poor survival rates. Buds and leaves appear on the cuttings. As a last resort, work is carried out in August, when the fruit ripens. Shoots will not appear until the following year.
Autumn
At this time of year, sap flow slows, and scion survival is impaired. Grafting continues until mid-October, when the average daily temperature is above 15°C. Grafting is done onto young rootstocks. Shoots emerge in the spring.
Pros and cons of cleft grafting
Cleft grafting has its pros and cons.
The advantages include:
- high survival rate of rootstock and scion;
- the possibility of connecting branches of different cross-sections and the same one;
- no displacement of the connected parts relative to each other;
- choosing any tree as a rootstock, if the root is healthy;
- easy execution of work.
The disadvantages include:
- it is necessary to achieve a tight fit of the parts being connected to each other;
- Do not allow the sections to dry out; they must be kept moist;
- the presence of sap flow is mandatory: the finger should be wet from contact with the cut;
- the appearance of growths at the junction of the cutting and rootstock.
Cleft grafting options
On a large square saw cut Tree cuttings are positioned in different ways. Let's look at the types of grafting:
- cross-shaped split from 4 cuttings;
- peripheral cleft;
- peripheral semi-cleft;
- central half-cleft;
- side cut.
Cruciate cleft
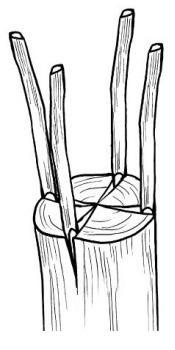
Make two clefts perpendicular to each other. Widen the first cleft with a screwdriver or wedge, and place the two cuttings opposite each other. Remove the screwdriver, widen the second cleft, and insert the other two cuttings. Tie the graft.
Peripheral cleft
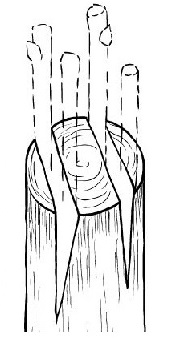
The ends of the cuttings are shaped into a 5 cm long wedge. The cambial layers of the rootstock and scion are aligned. The junction is tied and sealed.
Peripheral semi-cleft
The clefts of the grafted plant do not extend to the center or the opposite edge. They are arranged parallel or in a triangle for different numbers of cuttings (a, b).
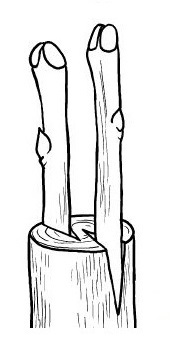
Side cut
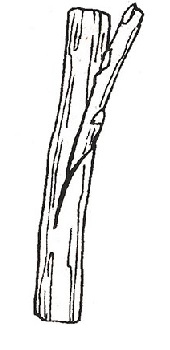
The mother plant should be thicker than the cutting. Two developed buds are left on the cutting, and two wedge-shaped buds are made at the end. cutA slit up to 3 cm long is cut into the rootstock. The scion is firmly inserted into the slit, aligning the cambial layers. The graft is tied and covered with putty.
What materials and tools are needed?
 The following materials and tools are required for this work:
- Copulatory knife with a "bone" - separates the bark from the wood.
- Secateurs – for cutting cuttings.
- Garden saw – for cutting thick branches.
- A flat-head screwdriver is used to spread apart the cut rootstock trunk.
- Garden var – the cuts are processed.
- Electrical tape – isolates the grafting site.
- Alcohol – disinfects garden tools.
The instruments must be clean, sharpened and disinfected.
Step-by-step instructions: how to properly cleft and cut graft
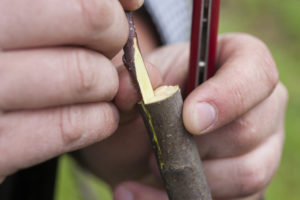
 The process is simple when grafting a cutting onto a thin branch. Grafting onto a stump or thick branch is more challenging. The process involves three steps:
- preparation of the mother stem and cuttings;
- joining the scion to the rootstock;
- covering the joint with a protective material.
Preparing scion: when and how
The scion is prepared in the fall or spring. It is cut at the end of November after the sap flow has stopped. Three to five buds are left above the grafting point. The scion should be a plant with unopened buds from a mature apple tree that produces fruit for at least two years.
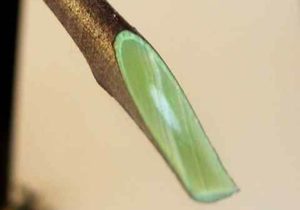
In spring (early March), cuttings are taken before the sap begins to flow and buds appear. The scion should be more than 7 cm thick and 30–40 cm long. Branches from older trees are cut to lengths of up to 15 cm. There should be 4–5 developed points; excess points are removed. The cuttings are cut into wedge-shaped pieces 21–28 mm long. Do not touch the cut ends with your hands.
Good scions are obtained from productive apple trees aged 3–10 years.
Storage
The quality of cuttings depends on storageAvoid creating conditions conducive to early bud development. Cuttings with buds and leaves are unsuitable for grafting. Store in a cool place at temperatures between 0 and +3°C. Protect:
- from frost;
- drying;
- damage by rodents.
To protect against rodents, cover the entire surface with fiberglass. Before grafting, check the quality of the material to ensure the bark is smooth and free of frost damage.
A frozen branch will turn the water yellow or brown. If the bark is wrinkled, make a new one. cutThe branch is placed in water for three days.
Selecting a rootstock
What to look for when choosing a rootstock:
- for compatibility with the scion;
- for cold resistance;
- on adaptability to lack and excess of water;
- for compliance with local climatic conditions;
- for the presence of a strong root.
How to prepare rootstock

Preparation of the rootstock is as follows:
- the crown of the tree is cut down, leaving a trunk 10–30 cm high;
- vertically cut the section to a depth of 4–5 cm;
If the mother plant for grafting is a wild plant, then it is prepared:
- clean away dirt;
- remove old bark;
- the trunk is cut to a height of 10–15 cm;
- clean the cut with a knife;
- a cut is made along the diameter to a depth of 20–28 mm.
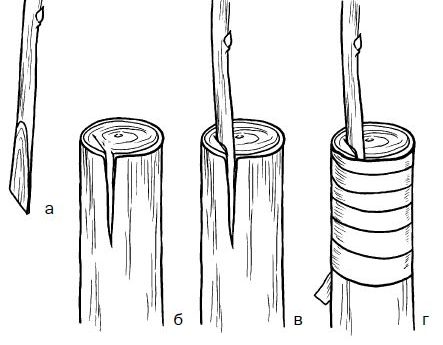
First, make a slit in the bark, then use a knife to deepen the slit by 5–7 cm. Insert a wedge or screwdriver and widen the slit. For a cross-shaped split, make two mutually perpendicular clefts.
How to graft a scion to a rootstock: the right technique
Splicing order:
- Before work, wash your hands thoroughly with soap and do not touch the cuts;
- the prepared cutting is inserted into a cleft in the plant or a small diameter branch so that the cambial layers are aligned;
- the cut part of the cutting is left above the split, but is not lowered all the way into the crack;
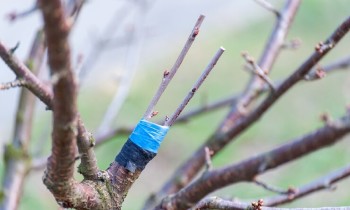
- wrap the connection point with electrical tape or cling film.
If grafting is done on a trunk or stump of large diameter, then two or four cuttings are grafted.
Make two clefts perpendicular to each other. First, insert two rootstocks into one cleft using the previous method, then two into the other. Align the cambial layers of the rootstock and scion, i.e., the inner edges of the bark. Insulate the junction with electrical tape or cling film, and seal the open areas. garden pitch.
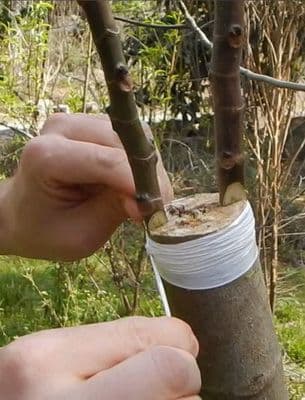
Insulation, feature
To protect the scion from external influences and ensure a tight fit between the rootstock and the scion, the junction is wrapped with electrical tape, rubber, or cling film. This accelerates healing. The scion cut, the rootstock end, and any exposed areas are coated with garden pitch. A plastic film cover is placed on top to retain moisture and create a comfortable environment for bud growth. The cover is removed once the buds begin to open.
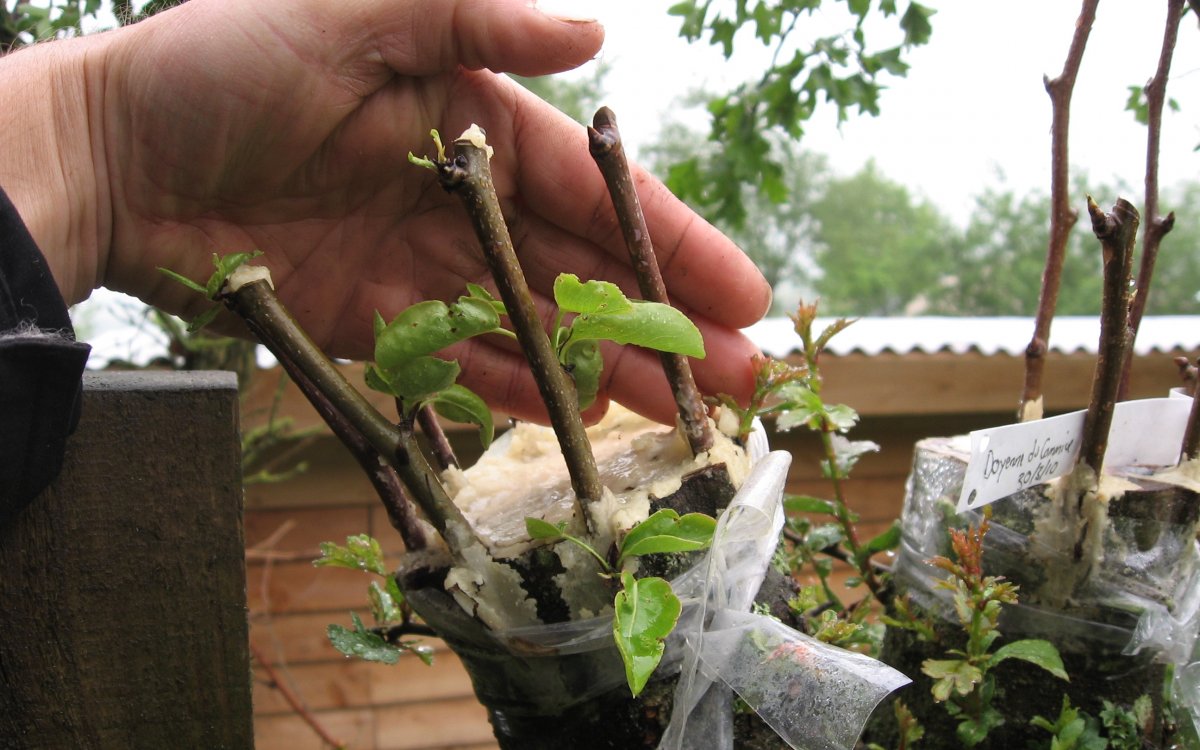
What does a grafted tree need?
A month after grafting, buds and new shoots appear. Caring for a grafted tree includes:
- Loosening of the grafting ligature. As the scion and rootstock grow, the ligature cuts into the wood and damages the plant. This can lead to the grafted portion breaking off.
- Maintaining moisture. Loss of moisture affects the survival of the graft. A tight seal with garden pitch protects the plant from drying out.
- Protect from direct sunlight. The grafting site is shaded by the crown of a neighboring tree.
- Supporting young shoots with props and garters.
- Removing young shoots below the graft site. Young shoots restrict the flow of nutrients to the graft site.
Conclusion
Beginning gardeners don't understand the intricacies of apple tree grafting. This will lead to failure and wasted time. The following are the reasons for failure:
- incorrect timing of vaccination;
- storing cuttings in a warm place and premature bud growth;
- misalignment of cambium layers or their displacement;
- use of putty containing harmful impurities.


Comments
Thank you so much for the fascinating article. It was very clearly explained for me as a beginner. Now I just need to start practicing at my mom's dacha. We'll be using your advice, thank you!
I luckily stumbled upon this website online. I hadn't heard of grafting apple trees before, thinking I'd just plant them and that was it. Indeed, my young apple tree isn't producing the fruit I'd hoped for. This article answered my questions. It turns out grafting is necessary, and at a specific time of year. I'll give it a try, thanks for the comprehensive guide.