How to Dry Apples in the Oven: Guidelines for Electric and Gas Ovens
About the dried ones apples are healthyMany people probably know this. And now, with healthy eating and a healthy lifestyle returning to fashion, home drying methods are becoming increasingly popular. Most people try to stock up on this delicacy before the cold weather sets in, so as not to deprive themselves of vitamins even in winter. But here's how to do it more easily and quickly. dry The debate continues about drying apples at home. We'll share some of the most accessible methods for preserving all the nutritional value of apples during the drying process.
Content
Prepare the raw materials correctly
Properly preparing apples for drying is half the battle. Preparatory work involves several stages:
- First, you should thoroughly rinse all the fruits under running water.
- The fruit should then be inspected. If there are any bruises or other defects, carefully remove them with a knife.
- Next, the fruits are cut into thin slices.
Not all apple varieties dry equally well, so be sure to choose your fruit wisely.
Choosing the perfect fruits
Winter apple varieties are the most aromatic and delicious. Their dense structure, which allows them to survive low temperatures, makes them ideal for slicing and drying. They don't crumble or become watery, so they're the best choice.
If you don’t have the opportunity to choose a winter apple variety for harvesting, you can try dry and summer fruit varieties. However, remember that such apples should be dry together with the skin, while winter ones, in principle, do not require this.
When selecting apples for drying, you need to use the following criteria:
- Fruits of the 1st categoryThese are fruits picked directly from the branches. They are free of any damage or defects, making them ideal for making smooth and beautiful dried fruit.
- Fruits of the 2nd categoryThese apples can be picked from branches or from the ground. They have minor damage, such as marks from shoots or dents from impacts when dropped. In principle, such raw materials are also suitable for making dried fruit for the winter.
- Fruits of the 3rd categoryThese are fallen apples. They may have small pits left by worms and other defects. It's best to avoid using these for drying, but you can still dry them if you have no other choice. Before drying, be sure to carefully remove all damaged parts, leaving only the healthy portion of the fruit.
How to cut apples for drying
It might seem like there's nothing complicated about slicing apples for drying. But even this process has its own nuances, which will determine the appearance, taste, and shelf life of the finished product.
Rules for cutting apples:
- Many people advise remove apple peel before drying (especially for winter apple varieties), but this is not at all necessary. The skin contains the most vitamins and beneficial microelements for the body. If you plan to preserve dried fruits If you're using the fruit as a base for compote, you can leave not only the skin but even the core. However, when drying fruit for charlotte, jelly, or jam, remove the skin, as its toughness will ruin the flavor of the finished dish.
- Cut the fruit You can use rounds, each about 5 mm thick, or slices of 7 mm. Slices that are too thick will dry unevenly (or not at all), while slices that are too thin will become rubbery and difficult to chew.
- When cutting, try to make the slices as uniform as possibleso that the drying process takes place simultaneously and in the future you will not have to dry them separately from all the other fruits.
- To prevent the slices from darkening from contact with air, they must first be soak in a citric acid solution (2 g per liter of water) or in lemon juice.
Drying Drying apples takes an average of 5-10 hours. Drying time depends directly on the fruit variety (hard and sour apples take longer to dry) and the thickness of the individual slices, so try not to make the slices too thin or too thick.
Optimal cooking temperature
Before you put your apples in the oven to dry, consider a few important points, namely the temperature regime:
- First, you should set the temperature to 50–60 °C.
- Then the temperature indicators gradually increase to approximately 80–95 °C.
- Fruits should only be placed in the oven when it is sufficiently hot.
- Open the oven door slightly once the temperature reaches 80°C. This will allow excess moisture to escape from the oven.
- Don't forget to constantly turn the apple slices over so that they dry evenly and at the same time (and don't stick to the parchment paper).
Methods for drying apples in the oven
There are several effective ways to dry apple slices in the oven. Each has its own pros and cons.
Drying on a baking sheet
 The easiest and most proven method:
- Line a baking sheet with parchment paper.
- Carefully arrange the apple slices on it.
- Preheat the oven to the desired temperature, then place the baking sheet with fruit in it.
- Don't forget to stir the fruit periodically so that it dries evenly.
- If you use several baking sheets, change their positions periodically.
Drying on a wire rack
This method has many advantages over the previous one. Firstly, this method dries the apples more evenly on both sides (and you don't have to constantly turn them over). Secondly, this method is much faster and easier to prepare. And thirdly, you don't need to find parchment paper.
Cooking process:
- Prepare the apples. Wash them, pat dry, cut them into thin slices, and blanch them in boiling water for 10 minutes (or simply hold the slices in a colander over steam).
- Place apple slices on a wire rack.
- Turn the oven on low heat or set the thermometer to 75 degrees immediately.
- Place the rack with apples in the oven.
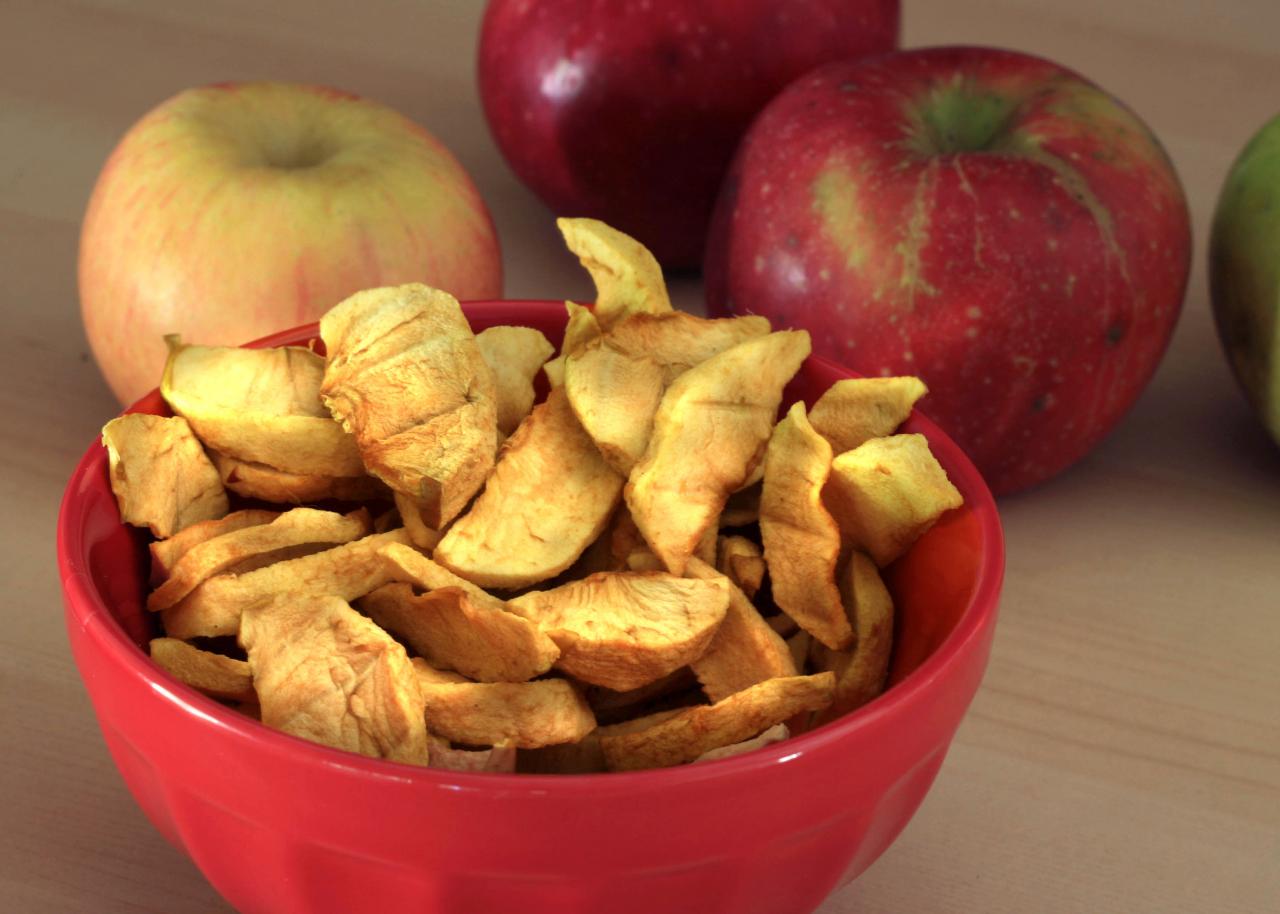
- The finished product will have a brown or yellow tint.
- After cooking, the apples should be cooled and then poured into canvas bags, paper bags or glass containers.
When drying apples on a rack, it is important to maintain a certain temperature regime:
- The correct drying process is one in which the temperature gradually increases over the first few hours of drying. Then, the temperature gradually decreases.
- Initially, the thermometer is set to 45–50 degrees Celsius. After 2–3 hours, this reading should be raised to 70–95 degrees Celsius.
- Once the moisture has almost completely evaporated from the apples, you should reduce the temperature to prevent the slices from burning.
Preparing apples in an electric oven with convection
Convection is a special system for distributing hot air inside the oven. The heat is distributed evenly (due to a powerful built-in fan), allowing for much more efficient drying of apples.
Step-by-step instructions:
- First, rinse the apples thoroughly under running water and dry them thoroughly.
- Cut the fruit into appropriately sized slices and then place them on the rack.
- Preheat oven to 50 degrees, place the rack with apples in the convection oven.
- Wait about 1.5 hours, then turn the slices over.
- Increase the oven temperature to 75 degrees.
- Wait another 1–2 hours (it will all depend on how long it takes for the moisture to evaporate from the fruit), and then reduce the temperature again to 50 degrees.
- Keep the fruit in the oven for another 1.5–2 hours.
- Check if the apple slices are ready, then turn off the heat and let the fruit cool.
Preparing apples in a gas oven
In this case, you can also dry fruits in two main ways:
- on a baking sheet covered with parchment paper (the easiest way);
- on the grill.
Step-by-step instructions:
- Preheat oven to 50–55 degrees.
- Line a baking sheet with parchment paper.
- Place thinly sliced apples on a prepared baking sheet. Make sure the layer of fruit is even.
- Place the baking tray in the oven.
- Open the oven door slightly to allow moisture to evaporate from the fruit. This will speed up the cooking process.
- After a couple of hours, stir the fruit slices.
- Increase the temperature to 70 degrees and close the oven door.
- If you use two baking sheets at once, remember to switch their positions periodically so that the apples dry evenly and simultaneously on them.
- Once the slices have shrunk to about half their original size, reduce the temperature again to 50 degrees.
- After 3-4 hours, you can remove the finished dried fruit from the oven. Cool it at room temperature.
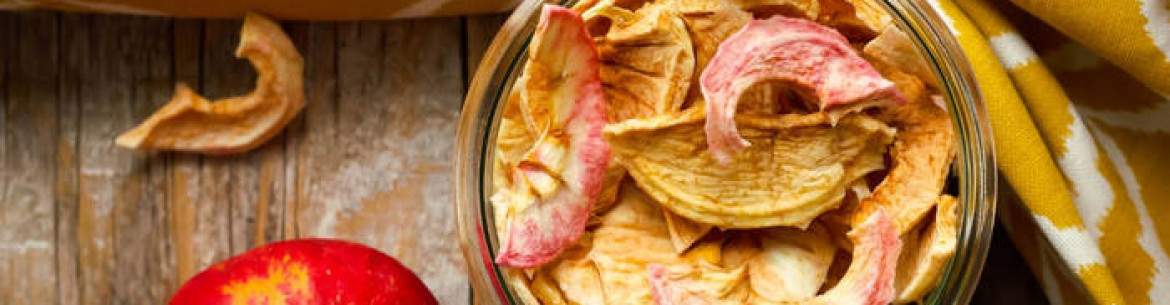
You can determine the readiness of dried fruit as follows: take an apple slice and bend it. If it bends easily but remains elastic, and your fingers remain clean, this is a sure sign the apples are ready. Overdried slices will break easily (these can be used for compote).
How to reduce cooking time
Many people think that drying apple slices in the oven is a simple and straightforward process. However, this isn't the case. It's important to consider many nuances and disadvantages:
- You need to constantly monitor the fruit throughout the entire cooking time.
- You should turn the fruit regularly and monitor the oven temperature.
- The drying process is a long one, which not everyone has time for.
It's this last drawback that often discourages most people from drying apples at home. Fortunately, there's a way to shorten the drying time:
- Peel the apples and cut them into slices.
- Cook the fruit slices in boiling water for 5–7 minutes. Then cool under running cold water.
- After this, you can send the slices to dry using the method you have chosen.
Dried apples are not only a tasty but also a healthy treat. They provide a vitamin boost even during cold weather or out of season. However, not everyone has access to dried apples at the store or market. Instead, they have to be prepared at home. Fortunately, this can be done in a regular oven.